Humidity sensors for home comfort are useful when you want a calmer way to notice damp rooms, dry winter air, basement changes, or bathroom moisture without guessing from how the room feels. A small sensor will not fix the problem by itself, but it can turn vague discomfort into a simple reading you can review.
The beginner mistake is treating one number like a command. Humidity changes during showers, cooking, laundry, weather swings, heating season, and closed-window days. The calmer approach is to use a sensor as an early clue, then match that clue with what you can see, smell, and safely adjust.
This guide focuses on simple, reversible routines. WattCalm provides general smart-home and energy-habit information, not electrical, HVAC, health, or financial advice. Always follow product manuals, appliance instructions, lease rules, and professional guidance for wiring, HVAC changes, mold concerns, or persistent moisture problems.
Why Humidity Sensors for Home Comfort Matter
Relative humidity is a measure of how much moisture is in the air compared with how much the air could hold at that temperature. You do not need to memorize the science to use a home sensor well. You only need to know whether a room is often too damp, often too dry, or changing in a way that deserves attention.
The U.S. EPA says indoor relative humidity should generally be kept below 60 percent, and ideally between 30 percent and 50 percent when possible, to help reduce moisture conditions that support mold growth: EPA mold and humidity guidance.
That does not mean every room must sit at the exact same number all day. A bathroom after a shower, a basement after heavy rain, and a bedroom during winter heat may each behave differently. The sensor helps you notice patterns instead of reacting to one unusual reading.
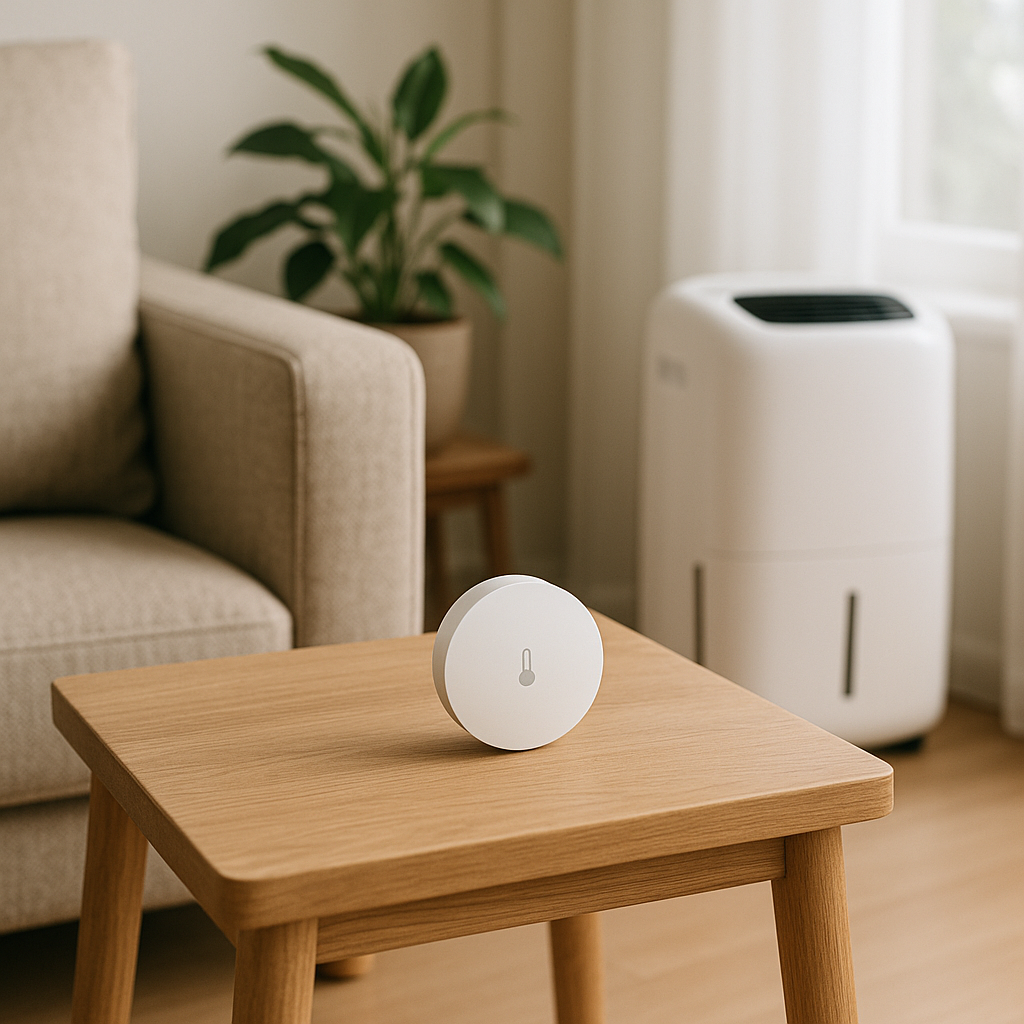
Start With Sensors for a Calmer Home
Start with one or two locations where humidity actually affects comfort. A sensor hidden in a random hallway may be interesting, but it may not help you make a useful decision.
- Bathroom: notice whether humidity drops back down after showers and fan use.
- Basement: watch for damp trends after storms, closed windows, or seasonal changes.
- Bedroom: check whether winter air feels dry at night or whether summer air feels heavy.
- Nursery or guest room: look for comfort patterns without turning the room into a technical project.
- Laundry area: notice moisture after drying clothes, leaks, or poor ventilation.
If you are still choosing which sensors belong in a beginner setup, the plain-English guide to smart home sensors for beginners can help you separate useful alerts from gadget clutter.
A humidity sensor works best when it has one job. For example: tell me if the basement stays damp overnight, show whether the bathroom fan clears moisture, or help me understand why a bedroom feels dry in winter.
Do not automate the solution too quickly
It is tempting to connect every reading to a smart plug, humidifier, fan, or dehumidifier right away. Wait until you understand the room first. A week of readings is often more useful than a complicated routine built on one afternoon of data.
Use names that match real rooms
Name sensors in plain language: basement humidity, main bath humidity, bedroom humidity, or laundry humidity. Good names make notifications easier to understand later.
What to Check First Before You Trust the Reading
A humidity sensor is only helpful if it is placed and interpreted reasonably. Different consumer sensors may not match perfectly, and placement can change readings more than beginners expect.
- Placement: keep the sensor away from direct steam, windows, vents, heaters, and exterior doors unless you are intentionally monitoring that spot.
- Height: place it where room air circulates naturally, not sealed inside a cabinet or pressed against a cold wall.
- Battery and signal: weak batteries or poor wireless signal can create missing data, delayed alerts, or confusing app behavior.
- Room purpose: a bathroom and a bedroom should not be judged the same way immediately after normal use.
- Manual limits: check the product manual for operating temperature, humidity range, indoor/outdoor rating, and calibration guidance.
For related comfort tracking, the WattCalm guide to temperature sensors at home shows the same basic habit: place the sensor where the reading helps a real decision.
When the reading seems strange, move slowly. Compare it with how the room feels, whether windows were open, whether a shower or dryer recently ran, and whether outdoor weather changed.
How to Use Humidity Sensors Step by Step
Use this sequence for one room at a time. It keeps the setup practical and gives you a cleaner picture of what is actually happening.
- Pick the room and reason. Choose one question, such as whether the basement stays damp overnight or whether the bathroom fan clears moisture after showers.
- Place the sensor in a steady location. Avoid steam blasts, sunny windows, vents, and hidden corners unless those are the exact spots you want to test.
- Record a normal week. Watch morning, evening, after weather changes, and after routine activities like showers or laundry.
- Look for repeat patterns. A single spike matters less than repeated high readings, slow recovery, musty smell, condensation, or visible dampness.
- Choose the simplest response. That may be running a bath fan longer, improving airflow, emptying a dehumidifier, or checking for a leak.
- Add alerts only when useful. Notify yourself when a room stays outside your chosen range for a while, not every time the number moves.
- Review after changes. After moving the sensor, changing fan habits, or adding a dehumidifier, watch the next week instead of assuming the problem is solved.
Using Readings With Fans, Humidifiers, and Dehumidifiers
Humidity readings often lead people toward appliances, but appliances need limits. A sensor can tell you the room is damp; it cannot tell you that a particular outlet, extension cord, drain setup, or appliance size is safe.
ENERGY STAR explains that portable room dehumidifiers are typically used for a single room or space, while whole-home dehumidifiers are generally installed to use home air ducts: ENERGY STAR dehumidifier guidance.
For a beginner, that distinction matters. A smart humidity routine for one damp room is different from a whole-house humidity problem. If multiple rooms stay damp, if there is visible mold, or if water appears after storms, treat the sensor as a clue and get appropriate help.
Keep electrical safety separate from convenience
Do not let a smart routine make an appliance setup less safe. Dehumidifiers, humidifiers, fans, and heaters should follow their manuals. Avoid improvised cords, wet areas, overloaded outlets, or hidden plugs.
The Electrical Safety Foundation International warns that extension cords can cause fire and injury if used improperly and should be treated as temporary equipment, not a permanent setup: ESFI extension cord safety guidance.
Make alerts less noisy
A useful alert might say the basement stayed above your chosen limit for two hours. A noisy alert buzzes every time humidity moves by one or two points. Use delay rules, quiet hours, or weekly review instead of constant interruptions.
Pros and Cons of Humidity Sensor Routines
Turns vague discomfort into a pattern
Instead of guessing whether a room is damp or dry, you can watch how readings change during normal use.
Helps you test simple habits
You can see whether running a bathroom fan longer, improving airflow, or emptying a dehumidifier changes the trend.
Works well without heavy automation
A basic sensor and a weekly review can be useful even if you never connect it to a complex smart-home routine.
Readings can be misleading in poor locations
Steam, vents, windows, and cold walls can make one spot look different from the room as a whole.
Appliance decisions still need caution
A humidity alert does not replace product manuals, electrical ratings, HVAC advice, or professional help for moisture problems.
Common Mistakes to Avoid
Most humidity sensor problems come from expecting too much too quickly. Keep the setup small and the interpretation practical.
- Reacting to one reading: look for repeated patterns, not a single spike after normal activity.
- Placing the sensor in steam: bathroom steam can be useful to observe, but it should not represent the whole home.
- Forgetting seasons: winter heating, summer humidity, rainy weeks, and closed-window days can all shift the baseline.
- Automating appliances without checking manuals: a smart plug or schedule should never override appliance safety guidance.
- Ignoring visible signs: musty odor, condensation, leaks, stains, and visible mold deserve attention beyond an app reading.
- Comparing rooms unfairly: a basement, bathroom, and bedroom each have different moisture patterns.
A Simple Humidity Sensor Checklist
Use this checklist before deciding the routine is working.
- Room purpose is clear: the sensor answers one real comfort or moisture question.
- Placement is steady: the device is away from vents, steam bursts, windows, and hidden corners.
- One week is reviewed: you have seen normal mornings, evenings, weather changes, and room activity.
- Alerts are rare: notifications happen only when the reading would lead to a useful action.
- Manuals are checked: sensor, fan, humidifier, dehumidifier, or smart plug limits are understood.
- Visible signs are considered: smells, condensation, stains, leaks, and comfort all matter alongside the number.
- Next step is simple: adjust one habit or location at a time, then review again.
When to Get Extra Help
Get extra help if readings stay high in several rooms, if you see visible mold, if there is water intrusion, if a dehumidifier fills constantly, if a room smells musty, or if humidity problems seem connected to HVAC performance. A small sensor can help you describe the problem, but it should not become a substitute for qualified inspection.
Also slow down if the routine involves hardwired equipment, bathroom electrical work, wet locations, appliance loads, shared-building rules, or anything that affects health and safety. The right answer may be ventilation, drainage, repair, appliance sizing, or professional advice rather than another smart-home rule.
Frequently Asked Questions
What should I check first with a humidity sensor?
Check placement first. Keep the sensor away from vents, direct steam, windows, heaters, and hidden corners unless you are intentionally testing that exact spot.
How often should I review humidity readings?
Review daily during the first week, then weekly or after weather, heating, cooling, shower, laundry, or appliance changes. Patterns matter more than constant checking.
Should humidity sensors control a dehumidifier automatically?
Only if the appliance, outlet, sensor, and smart-home setup support that use safely. For beginners, monitoring first is usually calmer than automating immediately.
Can I move the sensor later?
Yes. Move it when you want to test a different room or a better location, but give the new spot time to show a normal pattern before drawing conclusions.
Final Thoughts
Humidity sensors for home comfort are most helpful when they create a simple habit: place the sensor well, watch a normal week, look for patterns, and respond with the smallest safe change. They are not there to make the home feel more technical.
Start with one room where humidity affects daily comfort. If the reading points to a real concern, check manuals, visible signs, and trusted guidance before adding automations or appliances. A calm sensor routine should make moisture easier to understand, not add another stream of noisy alerts.